Your roof faces unique challenges from Long Island's coastal storms. Knowing these 10 warning signs helps you catch damage before the next nor'easter turns small problems into expensive emergencies.
Share:
Summary:
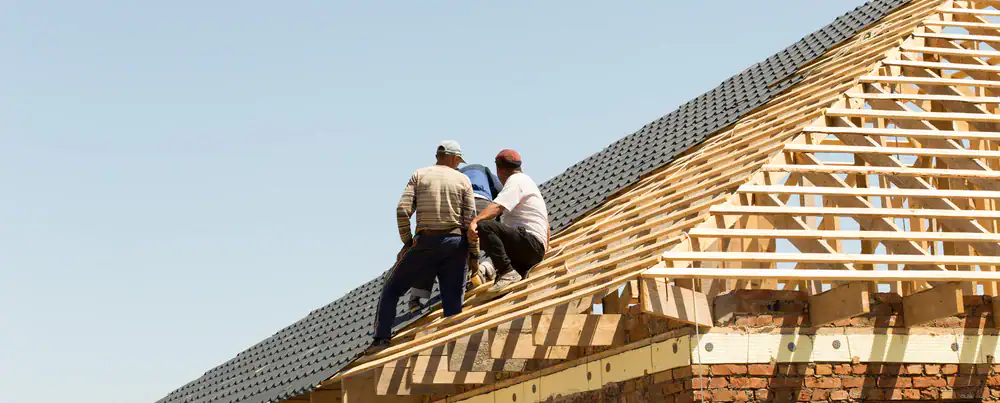
Walk around your property after any significant wind event and look up at your roofline. Missing shingles leave dark patches where the underlying material shows through. But the real problem isn’t always what’s missing—it’s what’s still up there but compromised.
Shingles that are cracked, curling at the edges, or sitting at odd angles have lost their ability to protect your roof deck. In Suffolk County, where coastal storms regularly bring 60+ mph winds, even shingles that look intact from the ground might have broken seal strips underneath.
When you start seeing widespread deterioration across multiple roof sections rather than isolated damage, you’re looking at systemic failure. That’s when repairs stop being a long-term fix and start being a temporary patch until replacement becomes necessary.
Your roof doesn’t age the same way roofs do in temperate climates. Suffolk County’s weather creates a perfect storm of deterioration factors that accelerate breakdown.
During winter, moisture seeps into microscopic cracks in your shingles. When temperatures drop, that moisture freezes and expands, widening those fractures bit by bit. Come spring, the thaw releases the pressure, but the damage remains. Over time, shingles lose flexibility and become brittle.
Summer brings its own problems. Prolonged UV exposure at high intensity dries out the asphalt oils that give shingles their elasticity. Once those oils degrade, your shingles can’t expand and contract with temperature changes anymore. They crack instead.
Then there’s the salt air. If you live anywhere near the coast—Long Beach, Patchogue, Port Jefferson, Brookhaven, or even a few miles inland—salt-laden air corrodes the metal fasteners holding your shingles in place. Even when shingles look fine, compromised fasteners reduce wind resistance during storms.
Nor’easters and seasonal windstorms test these weakened systems. High wind events apply uplift pressure to vulnerable seams. If the decking underneath is already weakened from previous moisture infiltration, fasteners pull loose. That’s why damage often worsens rapidly after storm season.
What looks like sudden failure is actually the end result of years of gradual stress. A 15-year-old roof in Suffolk County might show wear patterns similar to a 20-year-old roof somewhere with milder weather. Factor in not just chronological age but how many severe weather events your roof has survived.
Don’t climb on your roof to inspect damage yourself. Wet surfaces are slippery, and damaged areas might not support your weight safely. Use binoculars to inspect from ground level, and take photos of anything concerning for documentation.
Check your yard and gutters for shingle pieces after storms. Finding granules or shingle fragments on the ground tells you wind damage occurred even if you can’t see missing sections from your vantage point.
Pay special attention to roof valleys and areas where different sections meet. These spots take the most stress from weather and are often where flashing and shingles fail first. Look for shingles that appear darker or discolored in these areas—that’s usually moisture infiltration.
If you’re seeing damage across more than about 25-30% of your visible roof surface, you’re likely past the point where spot repairs make financial sense. When deterioration becomes systemic rather than isolated, replacement often costs less long-term than repeated sectional repairs that never fully solve the problem.
Professional storm damage assessments are crucial because trained contractors can identify hidden damage that homeowners miss. They know how to check flashing integrity, test shingle adhesion, and evaluate structural components that may have been compromised. Many insurance companies require professional documentation for storm damage claims anyway, so getting a qualified inspection protects both your roof and your wallet.
The key is acting before the next storm. That small problem you’re noticing now? It gets significantly worse when wind-driven rain finds those weak spots during the next nor’easter.
Want live answers?
Connect with a Home Team Construction expert for fast, friendly support.
Water rarely enters your home dramatically at first. It usually begins subtly—migrating beneath shingles, traveling along decking, and appearing far from the original entry point.
By the time you see visible interior staining, the leak has often been developing for months. In Suffolk County homes, especially older properties, moisture symptoms that began as minor shingle or flashing failures progress due to freeze-thaw expansion and humidity cycles.
Look for yellow, brown, or gray stains on ceilings and walls. These don’t always appear as big obvious water rings initially. Sometimes they start as faint discoloration that’s easy to dismiss. But even subtle staining means water is getting past your roof’s protective layers.

Check ceilings near corners and light fixtures first. Water follows the path of least resistance, flowing across the top of sheetrock or plaster until it finds the lowest point. Light fixtures create slight depressions in drywall, so water often appears there first.
Don’t ignore dampness around windows, especially on upper floors. Flashing around dormers and where walls meet the roofline are common failure points. You might see peeling paint, bubbling wallpaper, or soft spots in the ceiling before actual dripping occurs.
Your attic tells the real story. Head up there with a flashlight. Look for dark streaks on rafters, wet insulation, or daylight visible through the roof deck. If you can see light coming through, water can definitely get in. Damp insulation loses its effectiveness and creates perfect conditions for mold growth.
Musty odors are another red flag. Even if you don’t see water, your nose might detect moisture long before your eyes do. That earthy, damp smell in certain rooms or closets often indicates hidden roof leaks feeding mold problems you can’t fully see yet.
Check the attic after heavy rain. Fresh water stains, wet spots on decking, or moisture on the underside of your roof sheathing confirm active leaks. The challenge is that water can travel significant distances from the entry point, so tracking it back to the source requires understanding how roof systems channel moisture.
Most homeowners wait for visible ceiling stains before taking roof damage seriously. By that point, the problem has already progressed. Water has soaked insulation, potentially rotted framing, and created conditions for mold that can spread through wall cavities. What might have required a $500 flashing repair six months ago now involves structural work that runs into thousands.
Flashing problems cause more roof leaks on Long Island than any other single issue. These metal strips—usually copper, aluminum, or galvanized steel—direct water away from vulnerable areas where your roof meets chimneys, skylights, vents, and walls.
Suffolk County’s coastal climate is particularly hard on flashing. Salt air accelerates corrosion. Temperature swings cause metal to expand and contract repeatedly. Over time, this creates cracks, loose connections, and gaps where water can penetrate.
The tricky part is that flashing leaks often show up far from the actual problem area. Water enters at the chimney but appears on your ceiling ten feet away. That makes DIY diagnosis nearly impossible without understanding how water flows through roof systems.
Smart homeowners check flashing twice a year—spring and fall. Look for rust stains, separated joints, or missing pieces around chimneys and skylights. Check where different roof planes intersect and around any protrusions like vent pipes.
Chimney flashing takes the most abuse. The constant heating and cooling cycles, combined with exposure to Long Island’s weather extremes, make chimney flashing particularly vulnerable. If your home is more than 15 years old and you’ve never had the flashing inspected, you’re playing with fire—or in this case, water.
Professional inspections catch flashing problems homeowners miss. We spot hairline cracks, improper installations from previous repairs, and areas where sealant has dried out and lost effectiveness. In Suffolk County’s harsh climate, catching these issues early prevents the kind of water damage that turns a manageable repair into a structural nightmare.
Remember that building codes have specific requirements for flashing installation, and insurance companies often require professional installation for coverage. A licensed contractor understands these requirements and has the tools to complete repairs safely and correctly.
Your roof protects everything you’ve worked for. The difference between a $500 repair and a $5,000 disaster usually comes down to timing—catching problems before the next nor’easter finds those weak spots.
Walk around your property after every significant weather event. Use this as your roof inspection checklist: look for missing or damaged shingles, granules in your gutters, water stains inside, flashing problems, and any changes in your roofline. Check your attic for moisture, daylight, or musty odors.
When you spot something concerning, don’t wait. Water damage spreads fast once it starts, and Long Island’s weather doesn’t give you much breathing room between storm systems. Getting a professional assessment now—before water starts dripping through your ceiling—saves money and stress.
We’ve spent over 10 years helping Suffolk County homeowners protect their homes from coastal weather. We understand what nor’easters, salt air, and freeze-thaw cycles do to roofs, and we know how to spot problems before they become emergencies. When you need straight answers about your roof’s condition, reach out to us—we live and work in your neighborhood.
Article details:
Share:
Continue learning: