
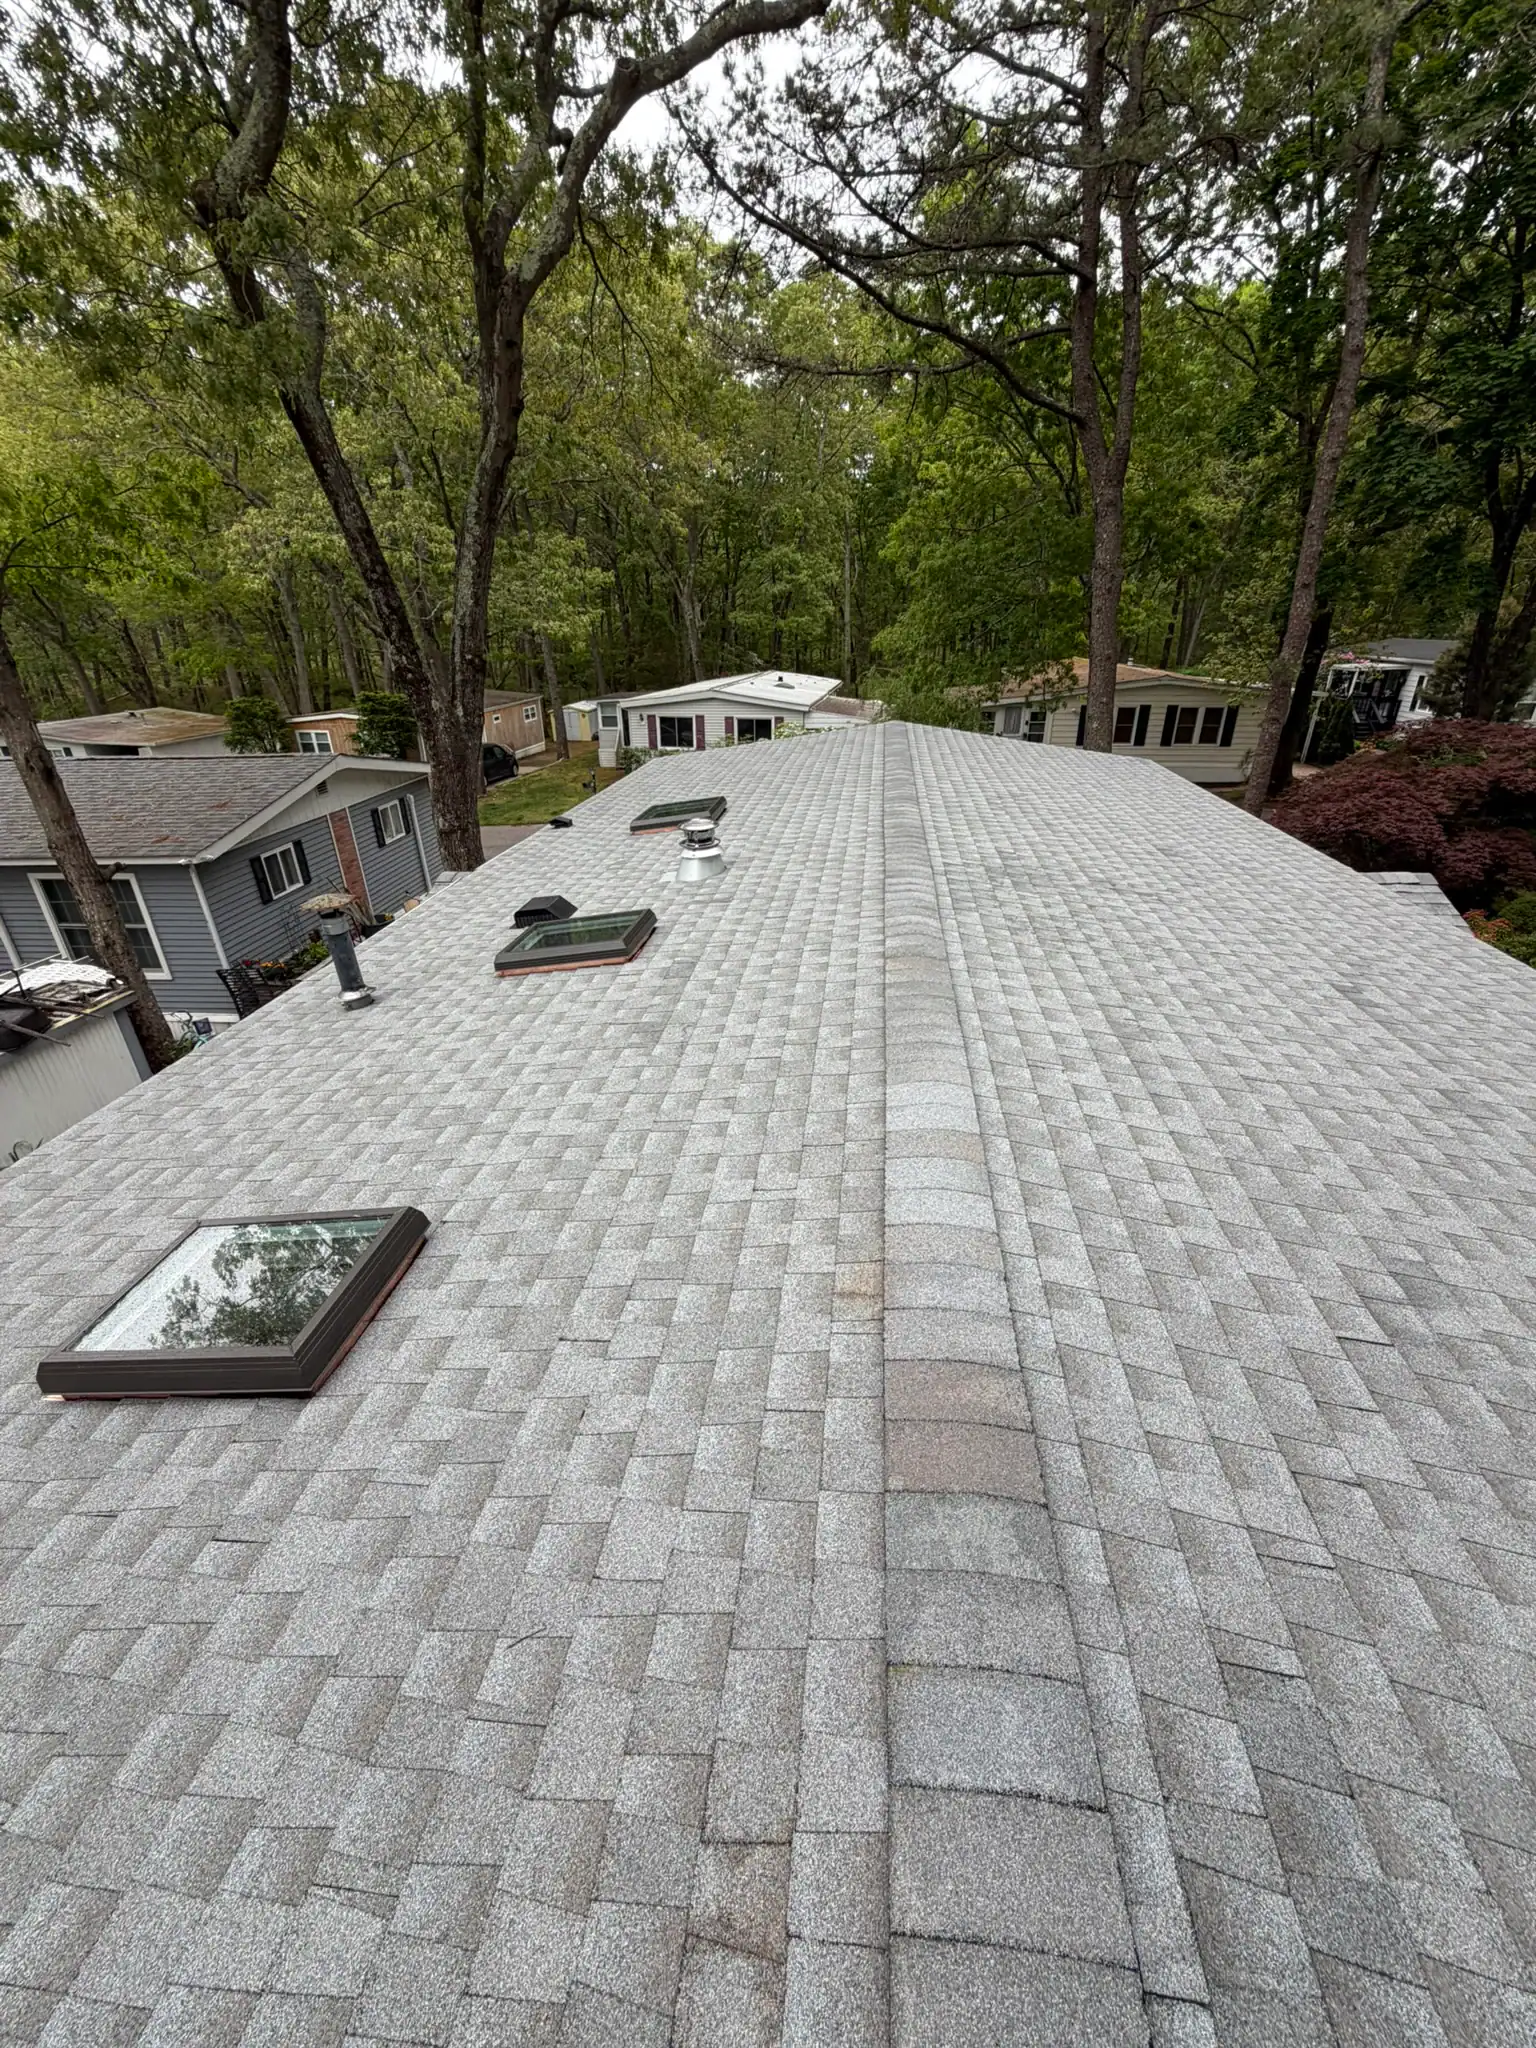
Roof Replacement with Skylight Reset in Selden, NY
New roof, and the skylights finally stopped leaking
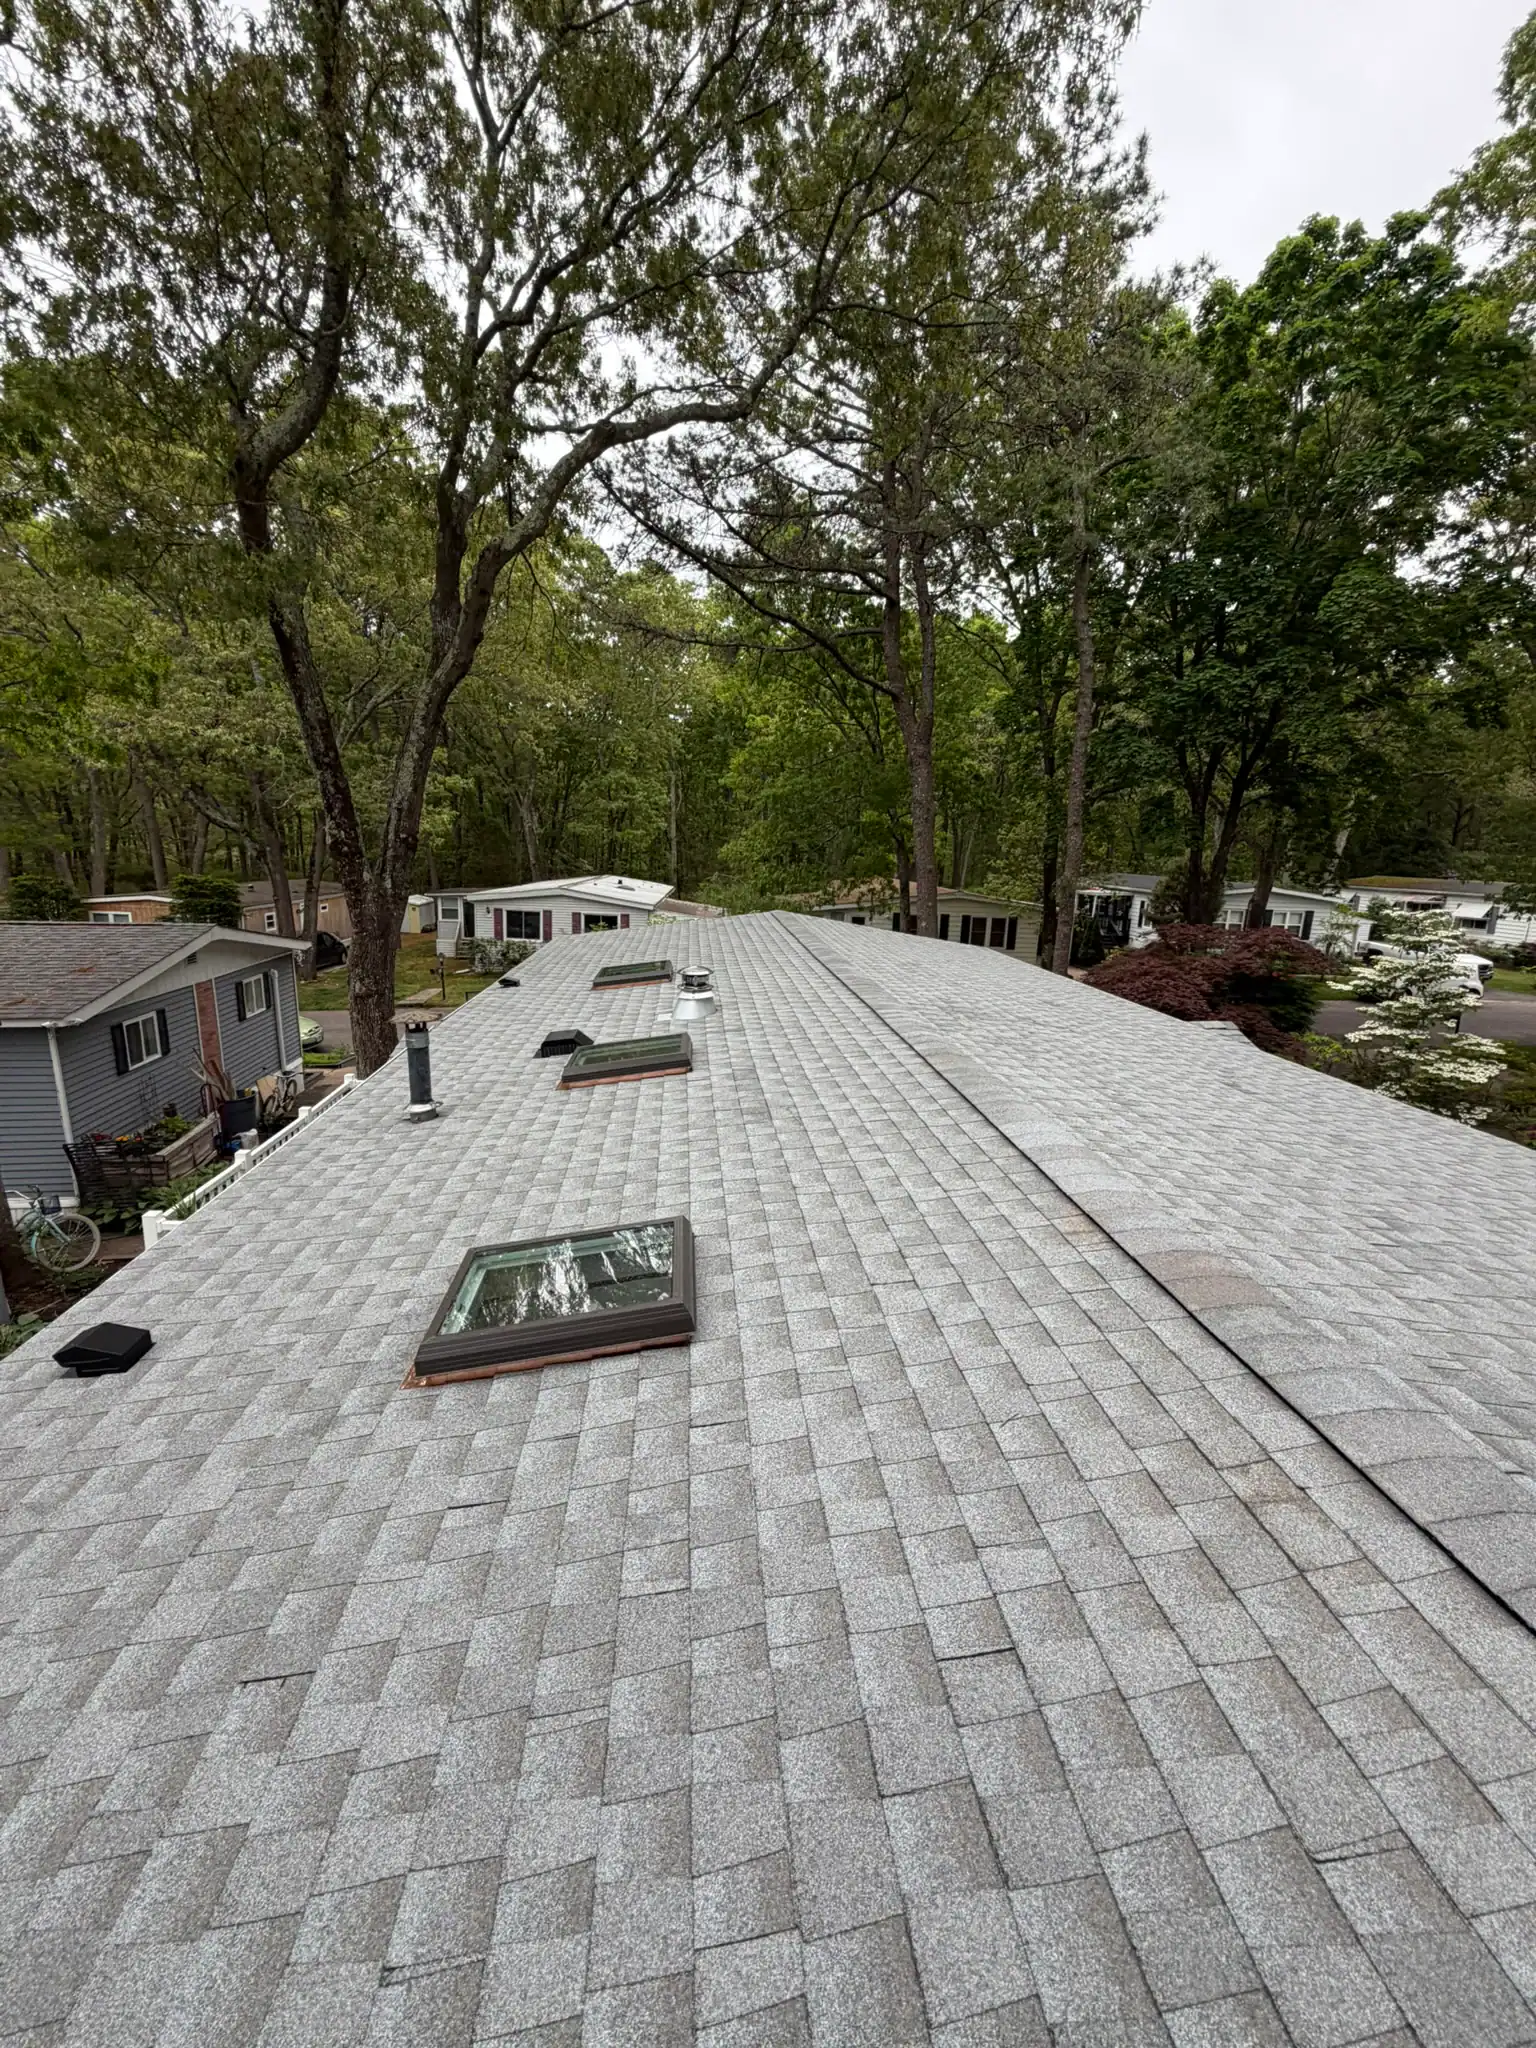
A long low roof on a wooded lot, stripped to plywood and rebuilt — with both skylights pulled, re-curbed and set into the new roof rather than flashed around and hoped for.
Selden, NY
Scope of workA homeowner in Selden contacted Home Team Construction after persistent wind-driven rain began causing minor drywall bubbling around an upstairs hallway skylight. The home's architectural shingle roof had surpassed its twenty-year mark, showing widespread granule loss, lifting tab edges, and cracked pipe boots across several slopes. Rather than attempting another temporary seal around an aging curb, the homeowner opted for a complete roof tear-off paired with a proper skylight rebuild.
The primary goals included:
- Stripping away multiple aging shingle layers down to the bare plywood sheathing.
- Evaluating and replacing any rotted decking around the skylight chase and roof valleys.
- Resetting the existing deck-mounted skylight with fresh flashing kits and waterproofing membranes.
- Installing a complete, wind-rated architectural roofing system to protect the home through central Long Island winters.
Our team evaluated the roof deck slope, checked attic rafters for past water staining, and established an efficient single-day tear-off and replacement plan.
- Property
- Single-storey, wooded lot
- Skylights
- Two, removed and reset
- Underlayment
- Ice-and-water, full coverage
- On site
- Three working days
What we found
The Tear-Off & Framing Assessment
When an aging roof reaches the end of its lifespan, skylights are almost always the first component to show failure. On this Selden ranch, old felt paper had degraded around the skylight curb, allowing slow, undetected water seepage to travel along the edge of the wooden curb frame. Once our crew stripped away the brittle shingles, we uncovered delaminated plywood sheathing and rusted framing nails surrounding the skylight base. The original metal flashing had been nailed directly through the face and coated with roofing mastic, which dried out and cracked under summer heat. To give the home lasting protection, we needed to repair the structural deck framing, properly flash the skylight perimeter, and build out a continuous moisture barrier across the entire roof plane.
What the tear-off turned up
- Softened plywood sheathing edges flanking the lower skylight curb
- Dried mastic patches cracked over rusted original aluminum step tins
- Extensive shingle granule loss exposing brittle fiberglass mat beneath
- Damp insulation batting packed tight against the skylight rafter opening
Two people had resealed those skylights and both times it came back the next winter. This is the first spring in four years the ceiling is dry.
How we did it
Step by step
-
Complete tear-off and deck repair
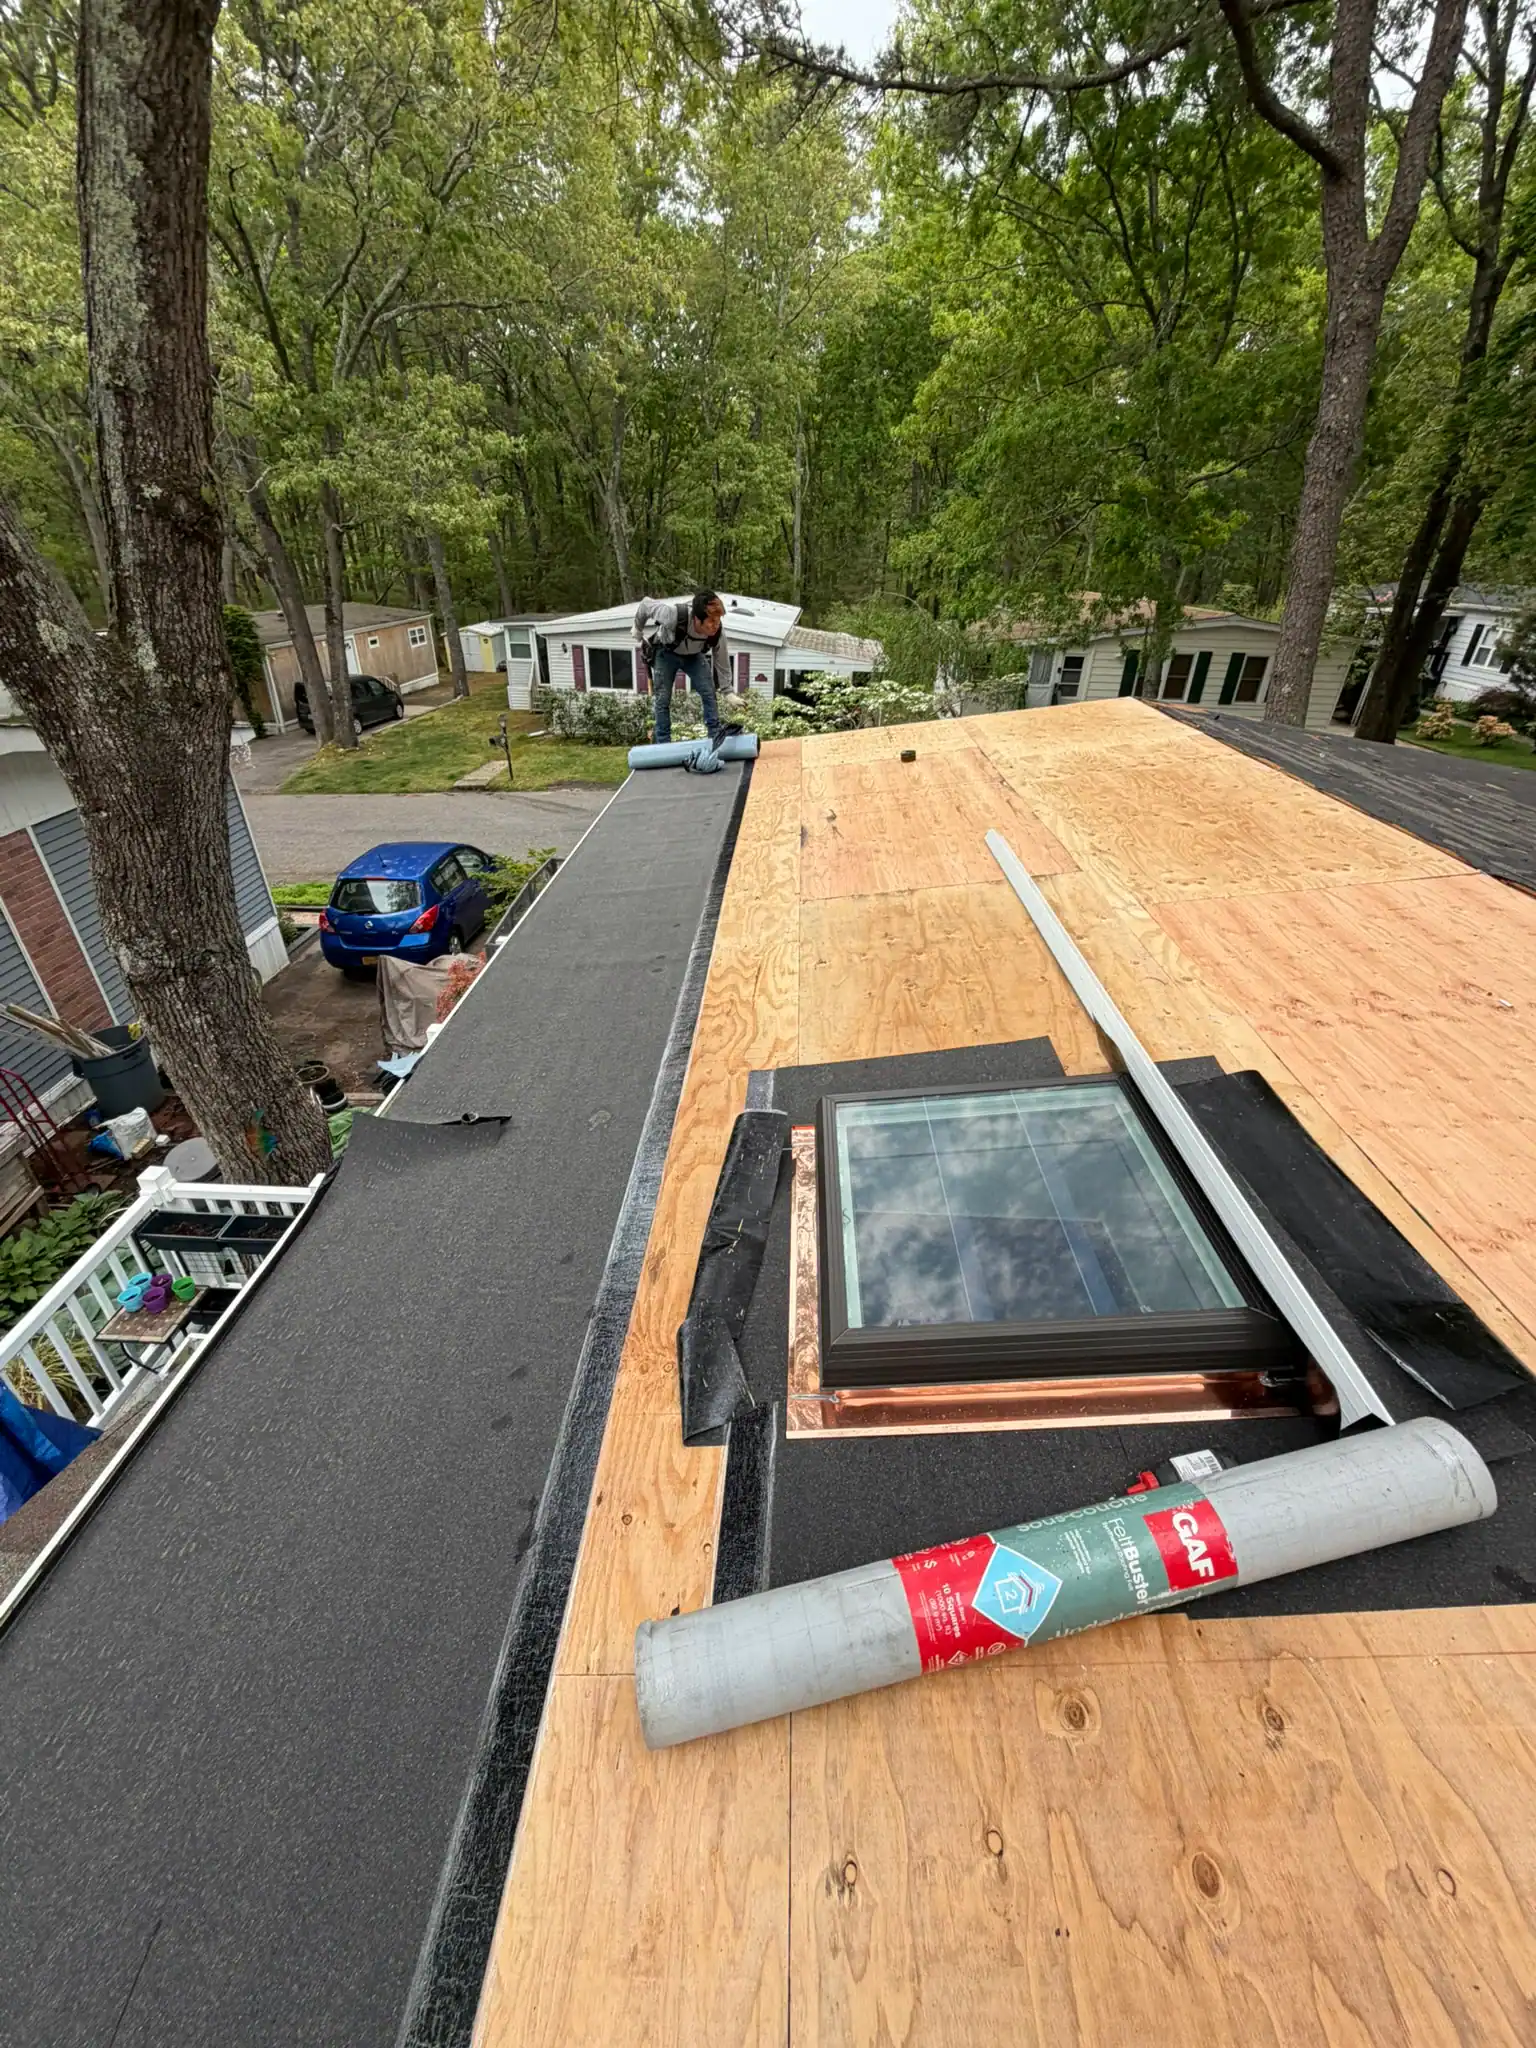
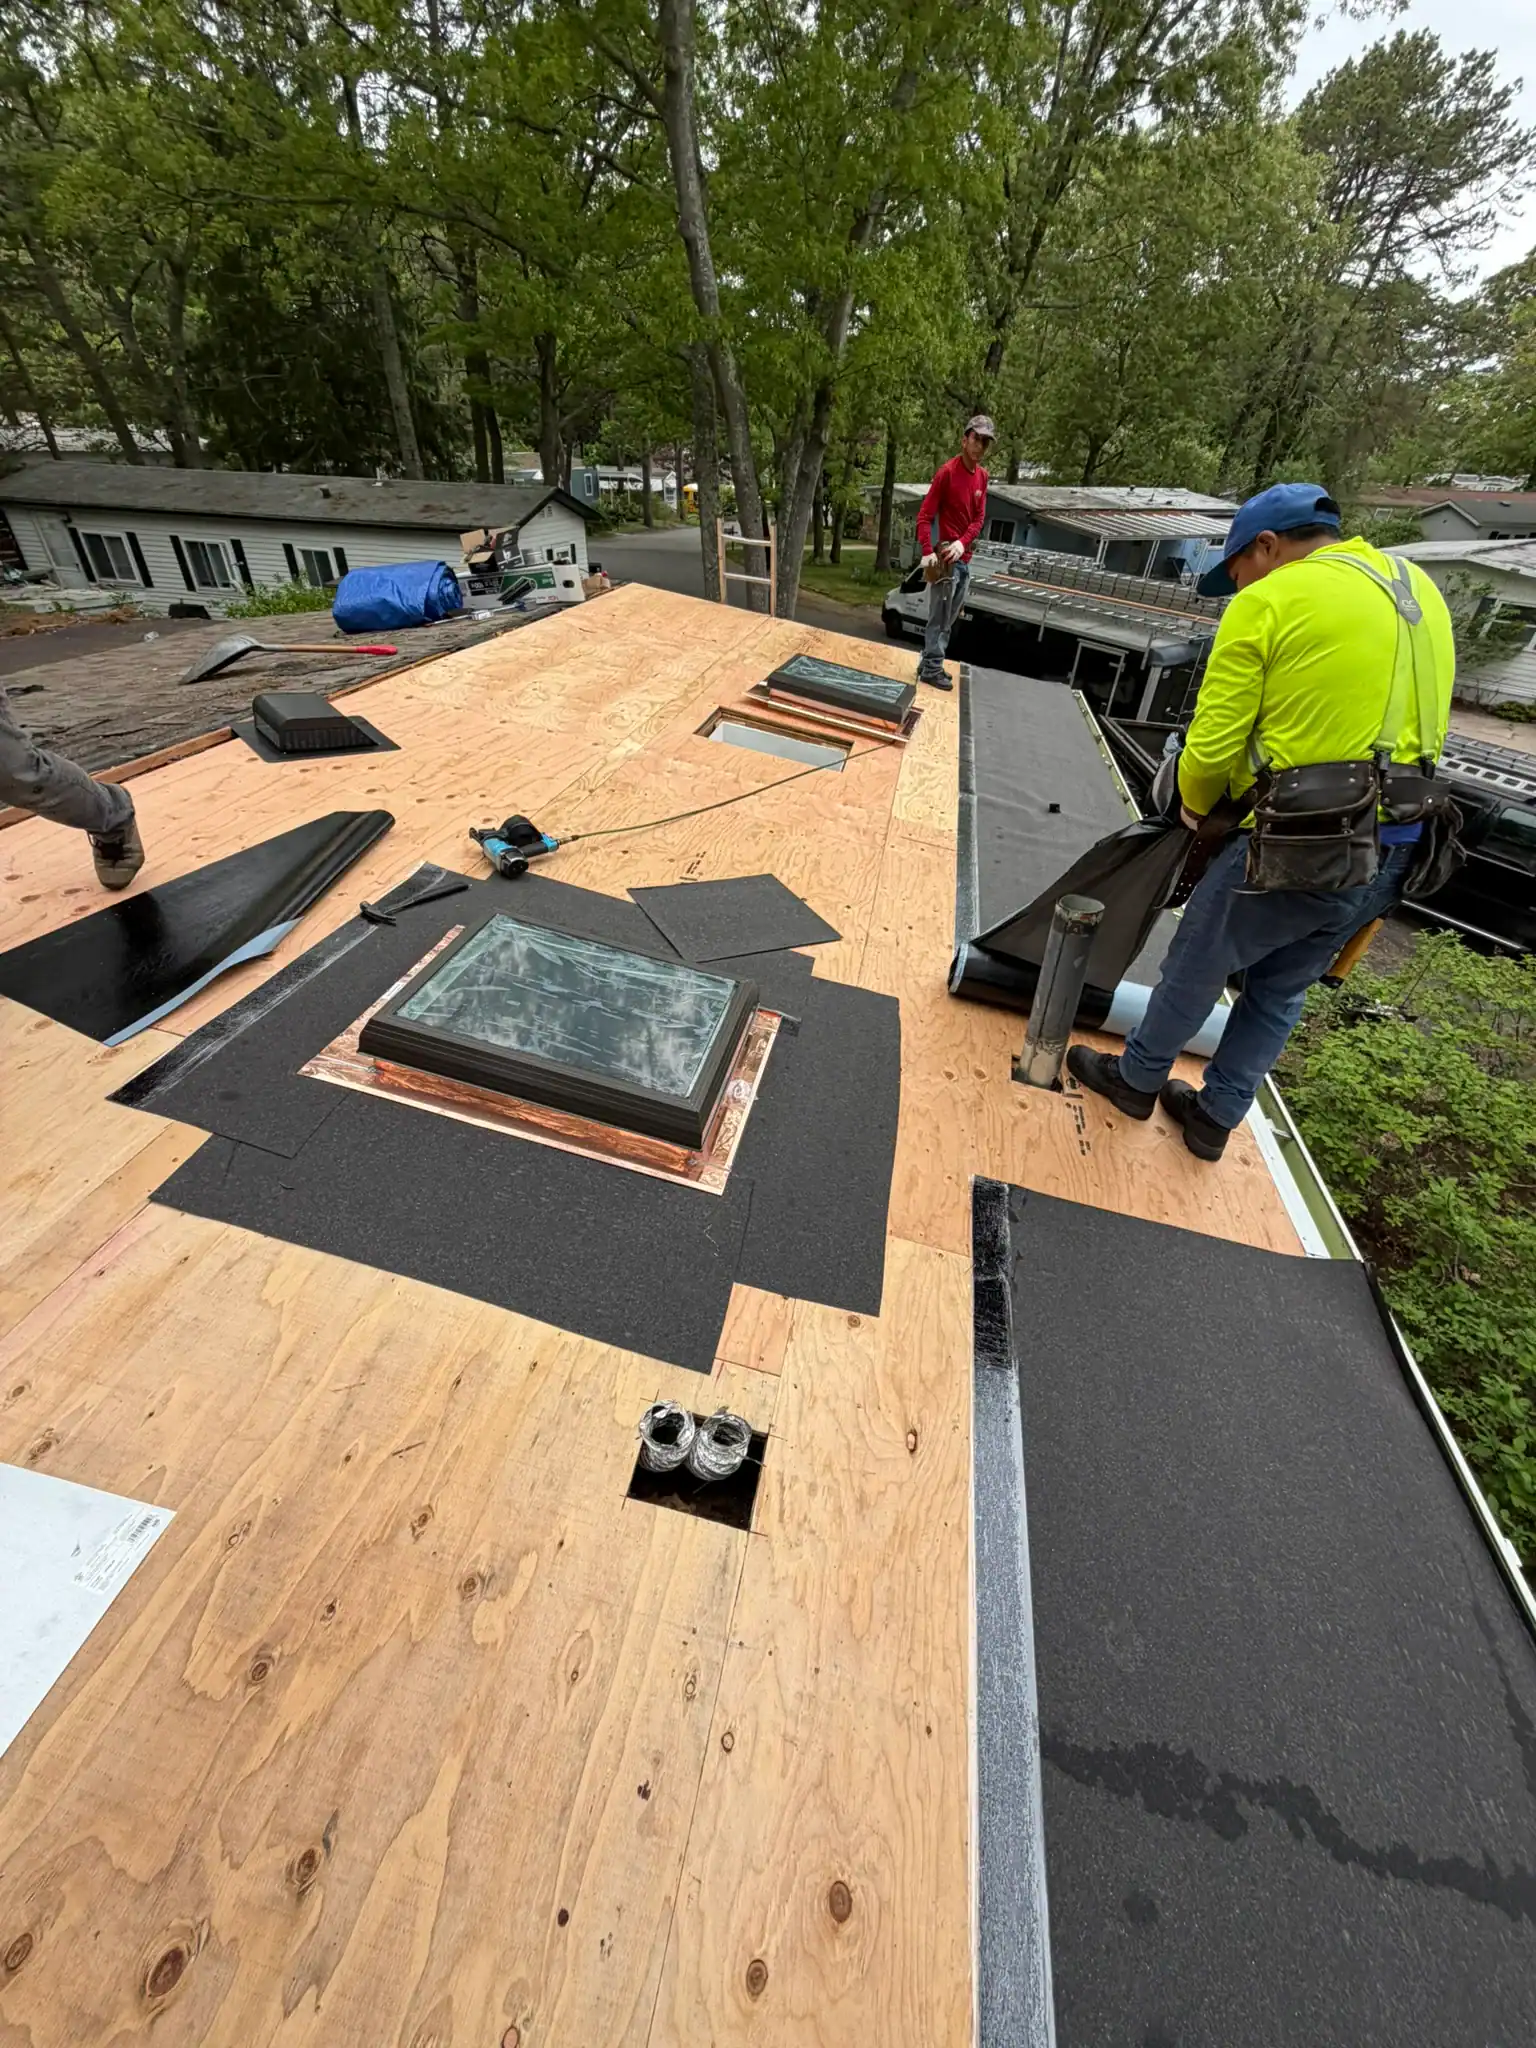
Stripped shingles down to bare plywood framing, cut out water-damaged wood around the skylight, and nailed down fresh CDX sheets.
-
Skylight reset and barrier installation
Removed old skylight trim, wrapped the curb in self-adhering waterproof membrane, and integrated pre-formed aluminum sill and step flashing.
-
Shingle installation and ridge ventilation
Nailed architectural shingles across synthetic underlayment, installed heavy-duty starter strips, and topped the peak with continuous ridge vent.
The result
Flashing Doing The Work, Not Sealant
Our crew restored structural integrity and long-term weather resistance by combining sound carpentry with an integrated moisture management system:
- Substrate Restoration: We removed all compromised plywood around the curb opening and installed new exterior-grade CDX sheathing, securing it directly to the roof trusses with ring-shank nails.
- Full-Curb Membrane Wrap: Before resetting the skylight trim, we applied high-temperature ice and water shield directly to the bare wood, running it up the vertical sides of the curb to stop lateral rain intrusion.
- Factory-Matched Flashing Kit: We discarded the old pieced-together metal and installed a brand-new aluminum flashing system, complete with an engineered sill apron, interlocking step flashing cards, and a head flashing piece to divert upper runoff.
- Heavy-Duty Shingle Field: The roof deck was prepped with tear-resistant synthetic underlayment and covered with lifetime architectural shingles fastened with six nails per shingle to withstand high coastal wind gusts.
- Optimized Attic Exhaust: We cut a clean slot along the main roof ridge and installed a baffled continuous ridge vent capped with matching ridge shingles, equalizing attic temperatures and lowering summer heat buildup.
The completed project gave the Selden home a clean, updated appearance, resolved the chronic ceiling leak, and delivered a watertight roof backed by proper manufacturer specifications.
This project pairs our roof replacement service with skylight replacement, done together so both are watertight from day one.
What went on
- Stripping brittle shingles down to raw plywood sheathing across all roof sections
- Replacing water-softened deck boards around the skylight frame with fresh structural plywood
- Wrapping the exposed wooden curb in self-adhering ice and water barrier membrane
- Interlocking new aluminum step cards with each shingle row alongside the skylight
- Cutting and installing continuous ridge vent along the peak to optimize attic airflow
Get Your Roof Fixed Right
Let’s talk about your project. No pressure, just honest answers and a quote you can count on.