Home Team Construction's Guides
Discover why roof flashing fails and how proper installation prevents the most common cause of roof leaks in Suffolk County homes.
Share:

Summary:
You’re dealing with water stains on your ceiling again. Maybe it’s that same spot near the chimney, or water mysteriously appearing around a vent pipe.
Here’s what most Suffolk County homeowners don’t realize: that leak probably isn’t coming from damaged shingles. It’s likely your roof flashing—and if it was installed wrong, you’re looking at a problem that’ll keep coming back until it’s fixed properly.
Let’s break down exactly how flashing works and why so many installations fail. For professional help and roof repairs, check this resource to learn what to look for and how to get it done right.
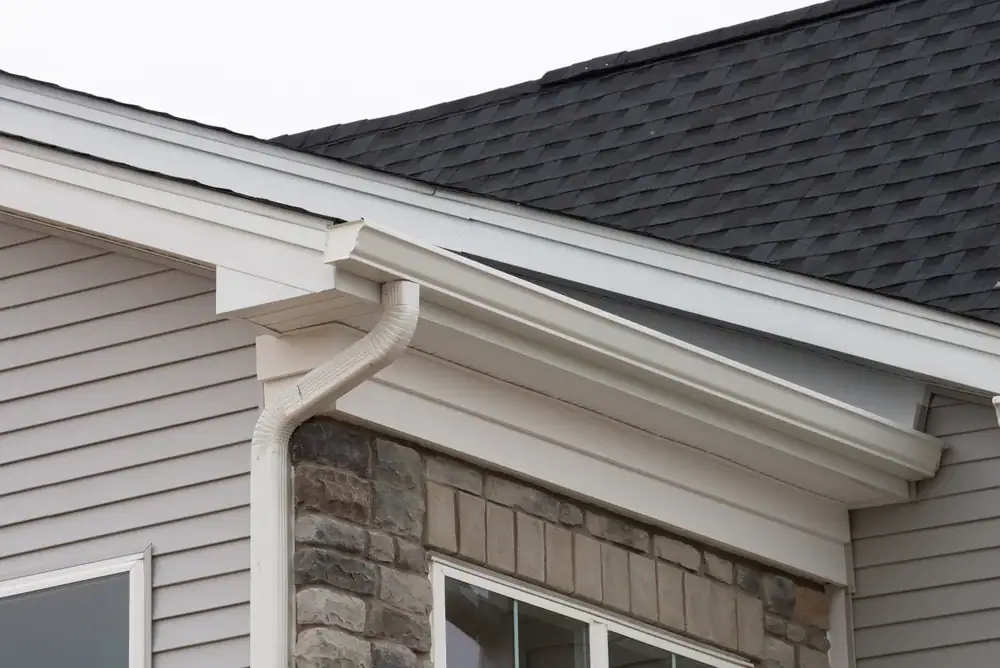
Think of roof flashing as your home’s raincoat seams. Just like how water can sneak through poorly sealed jacket seams, your roof needs protection wherever different materials meet or where something penetrates the surface.
Flashing is thin, waterproof material—usually galvanized steel, aluminum, or copper—that creates a watertight seal at these vulnerable spots. It’s installed around chimneys, vent pipes, skylights, and where your roof meets walls.
The concept is simple: flashing catches water and directs it away from these joints before it can seep into your home. When it works correctly, you never think about it. When it doesn’t, you’re calling contractors and dealing with water damage.

Not all flashing is created equal, and each type serves a specific purpose on your Suffolk County roof. Understanding these differences helps you spot potential problems and communicate effectively with roofing contractors.
Step flashing runs along sidewalls where your roof meets vertical surfaces. It consists of short, overlapping pieces that work with your shingles to shed water away from the joint. Each piece overlaps the shingle below and gets overlapped by the shingle above—creating a continuous barrier that moves with your roof as it expands and contracts.
Headwall flashing protects where your roof meets a wall head-on. This L-shaped metal extends up behind your siding and down over your roofing material. Valley flashing handles the internal corners where two roof planes meet, directing the heavy water flow that naturally collects in these areas.
Drip edge flashing runs along your roof’s perimeter, helping water drip cleanly into gutters instead of running back under shingles or down your fascia boards. Then there’s chimney flashing—often the most complex installation involving multiple pieces including base flashing, step flashing, and counter flashing that gets embedded into the chimney’s mortar joints.
Each type requires specific installation techniques. Get one wrong, and water finds a way in. The key is understanding that flashing isn’t just about the metal—it’s about how all these pieces work together as a complete water management system.
Here’s the reality: flashing installation looks straightforward, but it’s where many roofing projects fail. The devil is absolutely in the details, and small mistakes create big problems down the road.
Poor installation is the number one cause of flashing failure. Many contractors rush through flashing work or don’t understand the specific requirements for different roof types and materials. They might use the wrong gauge metal, skip proper sealing, or fail to create adequate overlap between pieces.
One critical mistake is nailing flashing to both the roof and the vertical surface. This seems logical, but it actually causes problems when your house settles or materials expand and contract with temperature changes. The flashing gets stressed and eventually pulls apart or develops gaps.
Another common error is reusing old flashing during roof replacement. Old flashing might look fine, but it’s been through years of weather cycles and may have microscopic cracks or compromised seals. When you’re investing in a new roof, cutting corners on flashing is like installing a new front door but keeping the old, worn-out weatherstripping.
Improper sealing is another major issue. Some contractors rely too heavily on caulk or roofing cement instead of proper mechanical installation techniques. These sealants break down over time, especially in Suffolk County’s varied climate conditions. Wind-driven rain during storms can exploit even tiny gaps that develop as sealants age.
The complexity increases around chimneys and complex roof lines. These areas require custom fabrication and precise installation. A contractor who doesn’t understand proper counter flashing techniques or how to properly embed flashing into masonry joints will create leak points that may not show up for months or years.
Want live answers?
Connect with a Home Team Construction expert for fast, friendly support.
The tricky thing about flashing problems is that by the time you see obvious signs, damage has likely been occurring behind the scenes for a while. But there are warning signs you can watch for during your regular home maintenance checks.
Water stains on ceilings or walls, especially near chimneys, skylights, or where roof lines meet walls, often indicate flashing issues. Don’t assume the stain location shows you exactly where the problem is—water can travel along rafters or other structural elements before appearing inside your home.
Outside, look for flashing that’s pulling away from surfaces, showing rust or corrosion, or has visible gaps or cracks. Pay attention to any flashing that looks loose or has been “repaired” with excessive amounts of caulk or roofing cement.

When flashing fails, water doesn’t just create stains—it starts a cascade of problems that can affect your home’s structure and your family’s health. Understanding these consequences helps you prioritize flashing repairs and maintenance.
Water infiltration from failed flashing can cause wood rot in your roof decking, rafters, and wall framing. This structural damage often isn’t visible until it’s extensive and expensive to repair. In Suffolk County’s humid climate, moisture problems can also lead to mold growth in wall cavities and attic spaces.
The financial impact goes beyond the immediate repair costs. Water damage can affect insulation, drywall, flooring, and personal belongings. Insurance claims for water damage can also impact your premiums and coverage. Many policies have specific exclusions for damage caused by poor maintenance or gradual leaks.
There’s also the disruption factor. Emergency repairs during storms or severe weather often cost significantly more than planned maintenance. You might find yourself dealing with tarps, emergency contractors, and temporary repairs while waiting for proper fixes.
Early intervention is always more cost-effective. A professional flashing inspection and minor repairs might cost a few hundred dollars. Waiting until you have structural damage, mold issues, or need emergency repairs during a storm can easily run into thousands of dollars.
Professional contractors who understand flashing systems can often spot and fix small problems before they become major headaches. This is especially important in Suffolk County, where weather patterns can stress roofing systems in ways that aren’t immediately obvious to homeowners.
The difference between proper and improper flashing installation often comes down to experience, attention to detail, and understanding local building conditions. Professional contractors bring knowledge that can save you significant money and frustration over your roof’s lifetime.
Experienced roofers understand how different materials behave in Suffolk County’s climate. They know which metals work best in coastal conditions, how to account for thermal expansion, and what sealing techniques hold up to local weather patterns. They also understand building codes and manufacturer requirements that ensure your warranty remains valid.
Professional installation includes proper material selection, correct fastening techniques, and appropriate sealing methods. Contractors who specialize in flashing work often fabricate custom pieces on-site to ensure perfect fits around complex roof features like chimneys, dormers, and skylights.
Quality contractors also understand the relationship between flashing and other roof components. They know how to integrate flashing with underlayment, shingles, and gutter systems to create a comprehensive water management system. This systems approach prevents the kind of isolated repairs that often fail because they don’t address the bigger picture.
The investment in professional installation pays dividends in reduced maintenance, fewer emergency repairs, and longer roof life. When you consider that replacing flashing during roof installation costs significantly less than separate repairs later, professional installation becomes even more cost-effective.
Working with licensed, insured contractors also provides protection if something does go wrong. Professional contractors carry insurance and offer warranties on their work, giving you recourse if problems develop. This protection is especially valuable for complex installations around chimneys and other roof penetrations.
Your roof flashing might be out of sight, but it shouldn’t be out of mind. Understanding how this critical component works—and why professional installation matters—helps you make informed decisions about your home’s protection.
Remember that flashing problems often develop gradually and may not show obvious signs until damage is already occurring. Regular inspections by qualified professionals can catch issues early when they’re still manageable and affordable to fix.
When you’re ready to address flashing concerns or planning any roofing work, we bring the experience and attention to detail that proper flashing installation requires. Don’t let poor installation turn a small repair into a major headache.
Article details:
Share:
Continue learning: